Subdomain setup guide
after DNS ACTIVE, connect this hostname at your destination platform
https:// or a path; A records use a public IPv4; Redirect uses a complete URL. Vercel
 Vercel
This is the tested Vercel flow for a subdomain already claimed at AICLUB.
1. Create and deploy the Vercel project
In Vercel, select New Project. Upload with Vercel Drop or connect your repository, choose a project name, then select Deploy.
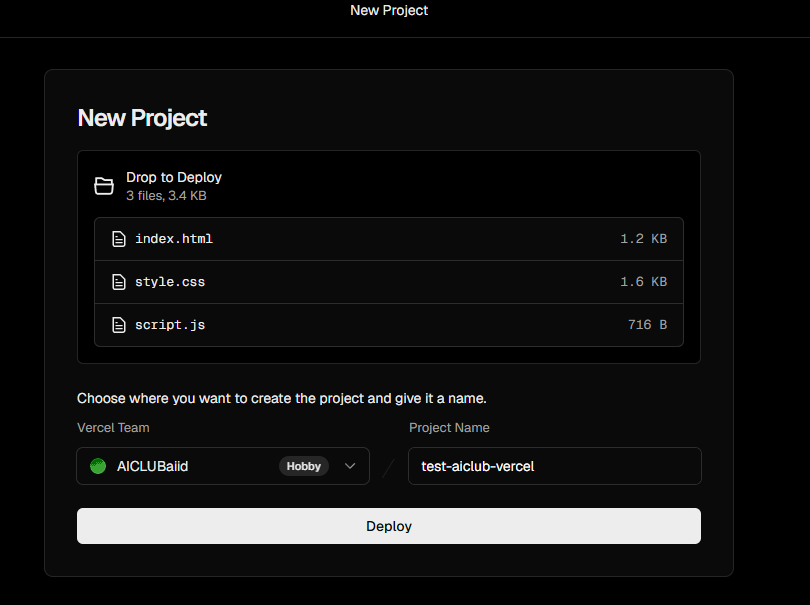
2. Confirm the production deployment succeeded
Wait until Vercel shows Congratulations or Ready, then select Continue to Project.
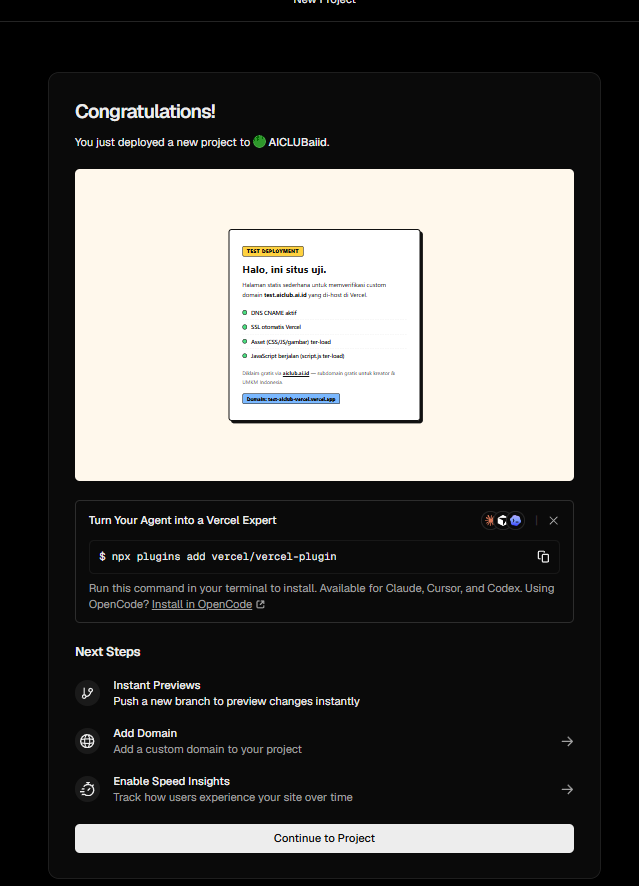
3. Open Domains for the project
On the project Overview, select the + beside Domains or open Domains from the project navigation. You can also use Add Custom Domain from the checklist.
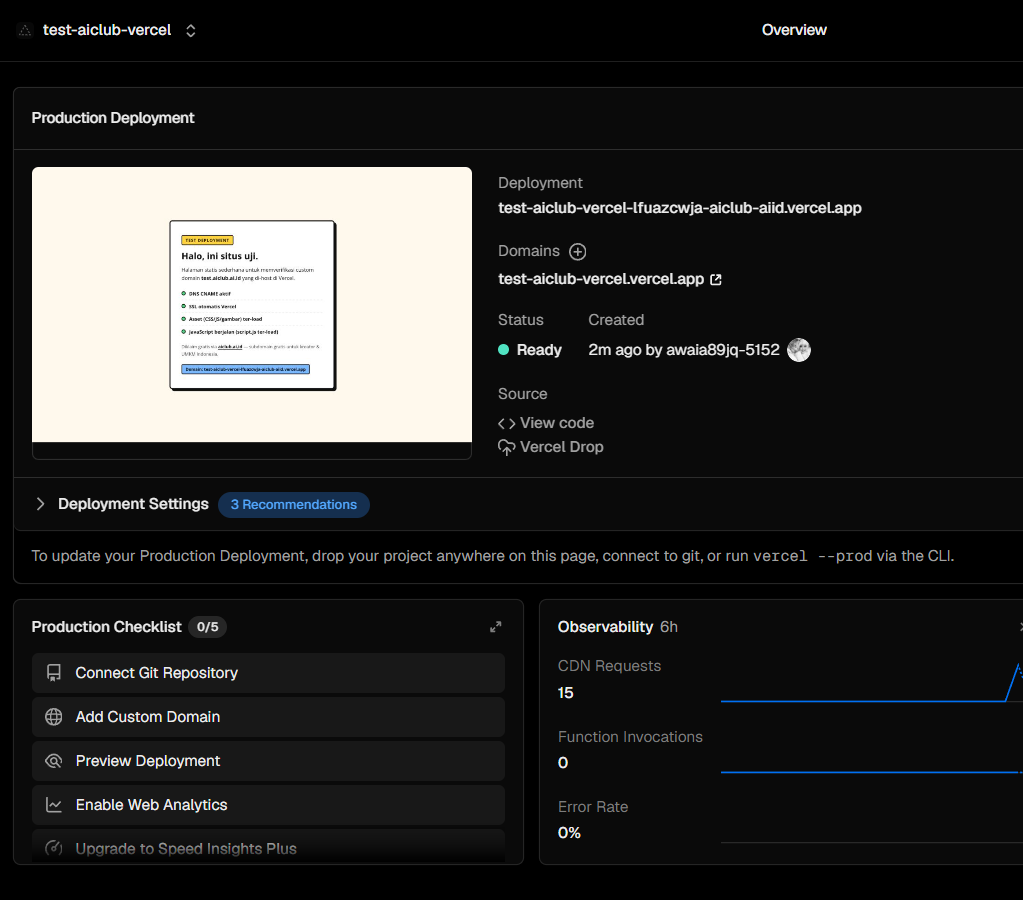
4. Add your AICLUB subdomain
Enter the exact subdomain you claimed at AICLUB, for example yourname.aiclub.ai.id. Keep Production selected, then choose Add Domain.
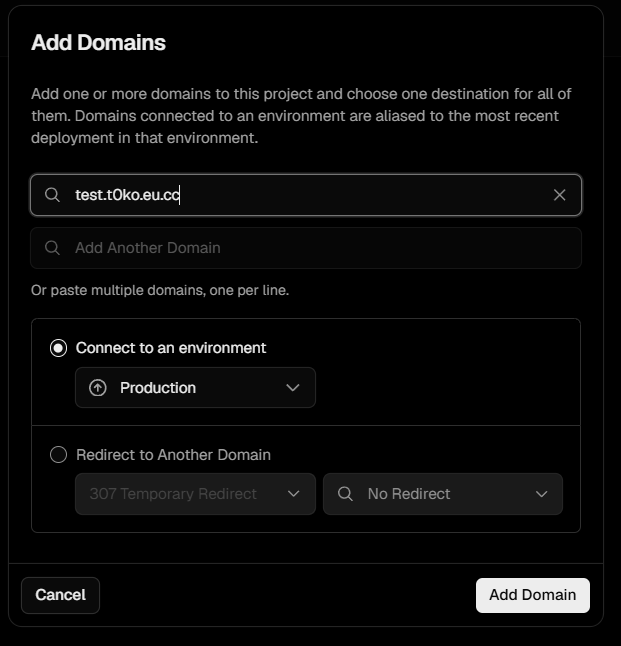
5. Copy Vercel's required CNAME value
Vercel may first show Invalid Configuration. In DNS Records, copy the complete value shown in the CNAME row. This value is unique to the domain verification request.
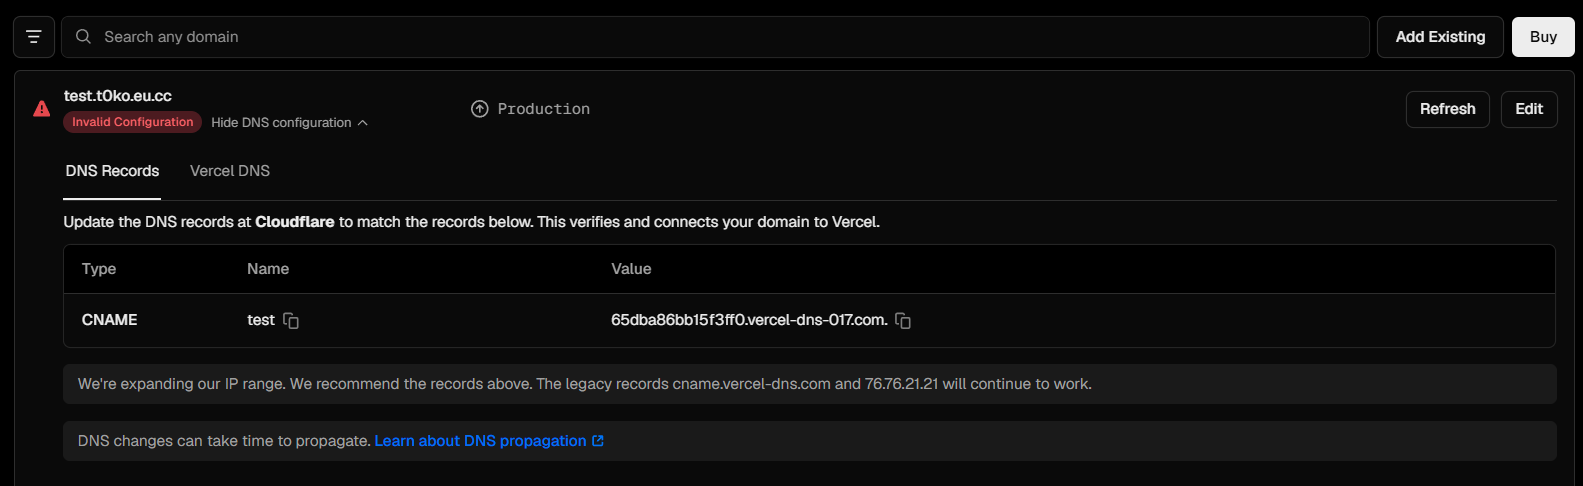
6. Save the CNAME in AICLUB and verify
In the matching AICLUB claim, choose CNAME, paste the Vercel value as the Target, and save. Do not add https://, a slash, or a path. Wait for DNS to update, then return to Vercel and select Refresh if needed. The setup is ready when Vercel shows Valid Configuration.

Netlify
- Open your Netlify site → Site settings → Domain management.
- Add
yourname.aiclub.ai.idas a custom domain. - For external DNS, use the site hostname such as
site-name.netlify.appas the CNAME target in AICLUB; no scheme or path. - After DNS ACTIVE, return to Netlify and complete verification.
- Netlify issues SSL automatically after the domain points correctly.
Cloudflare Pages
- Open your Pages project → Custom domains → Set up a custom domain.
- Add
yourname.aiclub.ai.id. - Use the project hostname such as
project.pages.devas the CNAME target in AICLUB; no scheme or path. - Keep the platform CNAME DNS-only; do not enable Cloudflare proxy for this record.
- If a zone/account warning appears, continue CNAME verification without moving nameservers. Wait for the custom domain and SSL to become active.
GitHub Pages
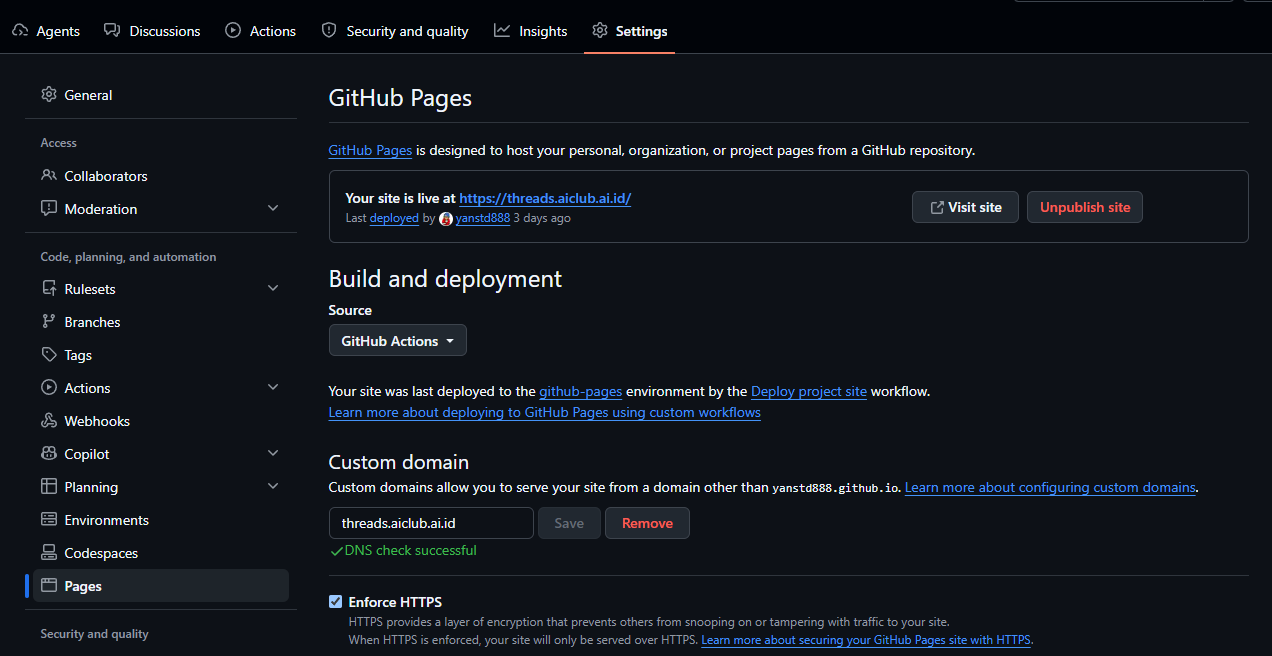
- Open the repository → Settings → Pages.
- Make sure the site is published, then enter
yourname.aiclub.ai.idunder Custom domain and Save. - The AICLUB CNAME target must be the bare default hostname such as
username.github.io; never append/repository-nameorhttps://. - Wait for the DNS check to show success.
- Required: enable Enforce HTTPS. Setup is not complete until it is checked.
- Use GitHub TXT domain verification when available so another party cannot take the domain.
- If Enforce HTTPS is unavailable, wait for domain and certificate verification before sharing the URL.
VPS or your own server
- Use an A record with the public IPv4 only; do not enter a URL, port, or path.
- Allow TCP ports
80and443through the firewall/security group and router. - Configure a virtual host/server_name for
yourname.aiclub.ai.id. - For a static site on Caddy, use
root * /var/wwwandfile_server; for an app, usereverse_proxy 127.0.0.1:4000. - Issue TLS and test from outside the server. Caddy can automate HTTPS after DNS and ports are ready; Nginx commonly uses ACME/Certbot.
Sources and review date
Last reviewed: 2026-10-25. Primary setup documentation: Cloudflare Pages, Vercel, Netlify, and GitHub Pages. Terakhir ditinjau: 2026-10-25; sumber utama adalah dokumentasi resmi penyedia di atas.