Panduan setup subdomain
setelah DNS AKTIF, sambungkan hostname ini di platform tujuanmu
https:// atau path; A Record memakai IPv4 publik; Redirect memakai URL lengkap. Vercel
 Vercel
This is the tested Vercel flow for a subdomain already claimed at AICLUB.
1. Create and deploy the Vercel project
In Vercel, select New Project. Upload with Vercel Drop or connect your repository, choose a project name, then select Deploy.
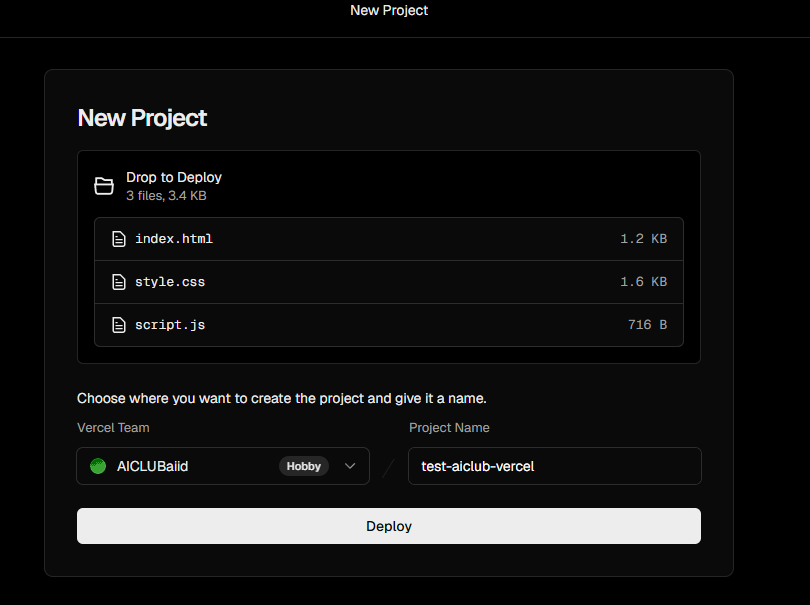
2. Confirm the production deployment succeeded
Wait until Vercel shows Congratulations or Ready, then select Continue to Project.
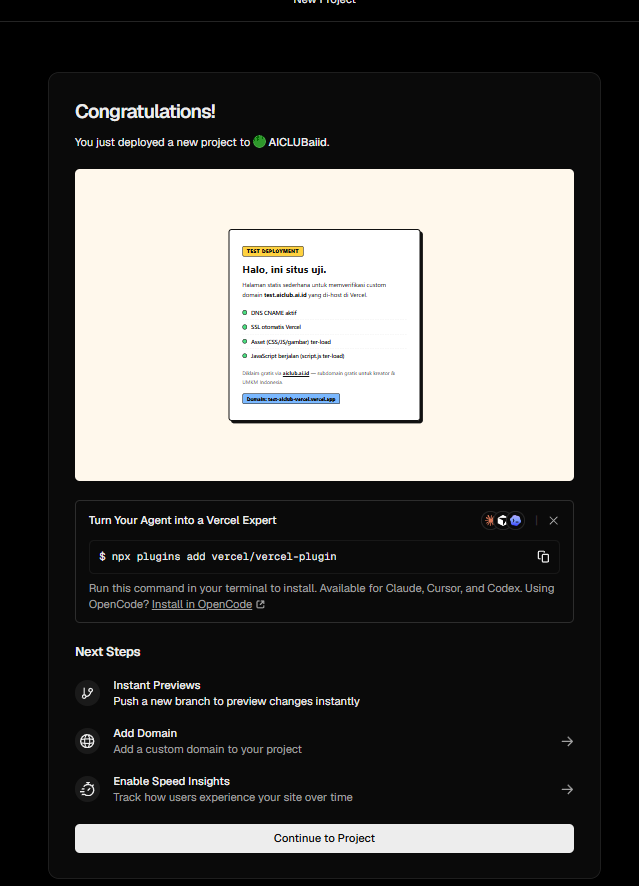
3. Open Domains for the project
On the project Overview, select the + beside Domains or open Domains from the project navigation. You can also use Add Custom Domain from the checklist.
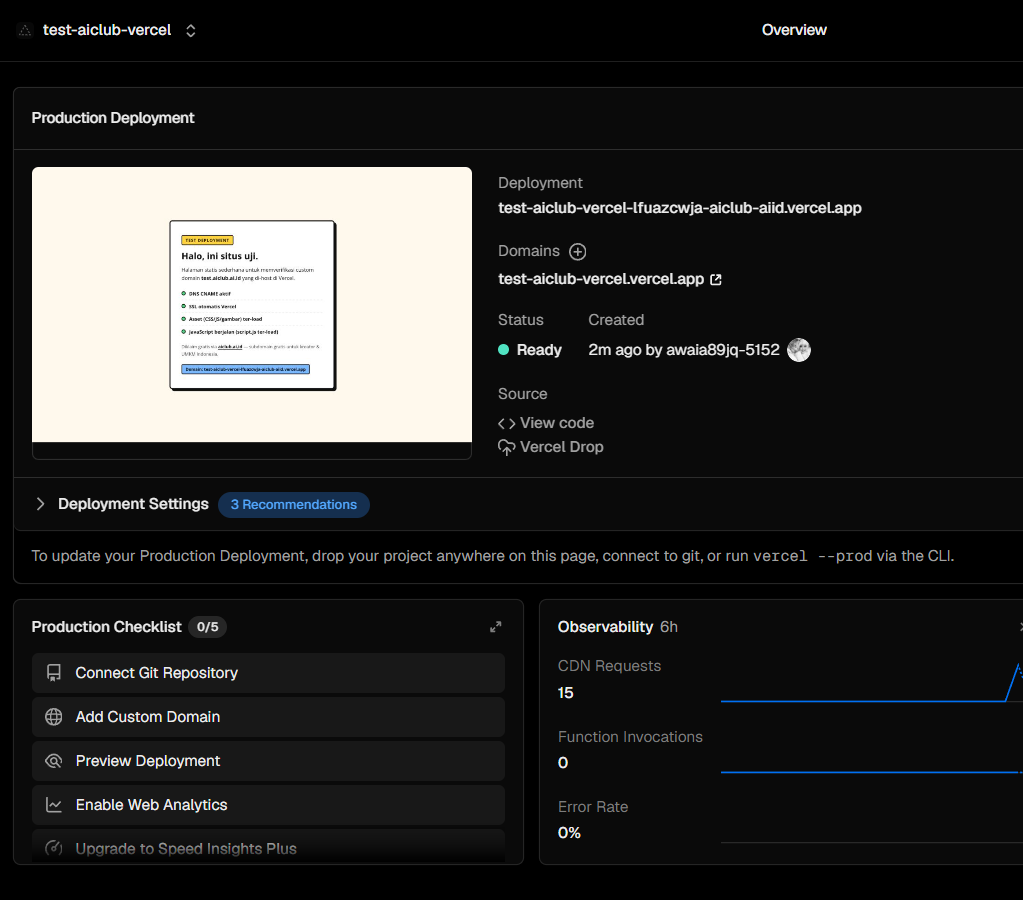
4. Add your AICLUB subdomain
Enter the exact subdomain you claimed at AICLUB, for example yourname.aiclub.ai.id. Keep Production selected, then choose Add Domain.
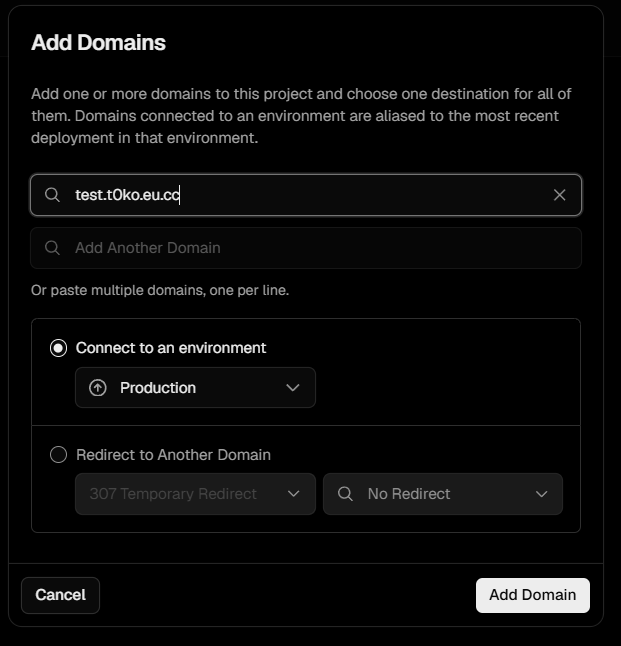
5. Copy Vercel's required CNAME value
Vercel may first show Invalid Configuration. In DNS Records, copy the complete value shown in the CNAME row. This value is unique to the domain verification request.
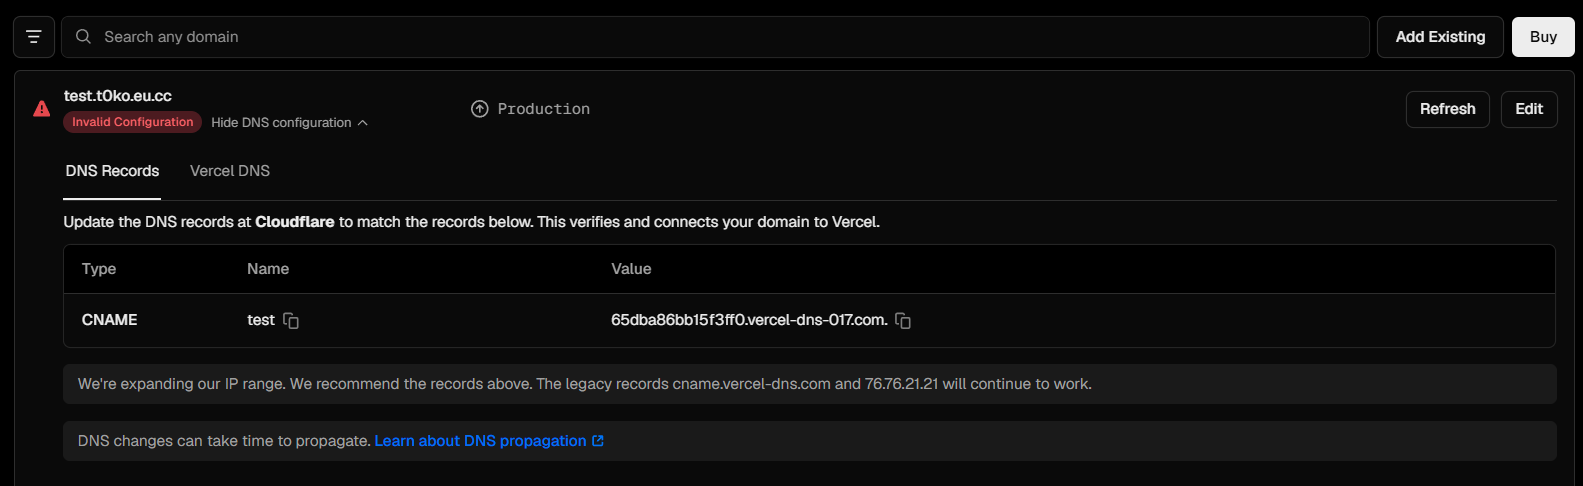
6. Save the CNAME in AICLUB and verify
In the matching AICLUB claim, choose CNAME, paste the Vercel value as the Target, and save. Do not add https://, a slash, or a path. Wait for DNS to update, then return to Vercel and select Refresh if needed. The setup is ready when Vercel shows Valid Configuration.

Netlify
- Buka site di Netlify → Site settings → Domain management.
- Tambahkan
namamu.aiclub.ai.idsebagai custom domain. - Untuk DNS eksternal, gunakan hostname site seperti
site-name.netlify.appsebagai target CNAME di AICLUB; tanpa scheme atau path. - Setelah DNS AKTIF, kembali ke Netlify dan selesaikan verifikasi.
- Netlify menerbitkan SSL otomatis setelah domain mengarah dengan benar.
Cloudflare Pages
- Buka project Pages → Custom domains → Set up a custom domain.
- Tambahkan
namamu.aiclub.ai.id. - Gunakan hostname project seperti
project.pages.devsebagai target CNAME di AICLUB; tanpa scheme atau path. - Biarkan CNAME platform berstatus DNS-only; jangan aktifkan proxy Cloudflare untuk record ini.
- Jika muncul peringatan zone/account, lanjutkan verifikasi CNAME tanpa memindahkan nameserver. Tunggu custom domain dan SSL aktif.
GitHub Pages
- Buka repository → Settings → Pages.
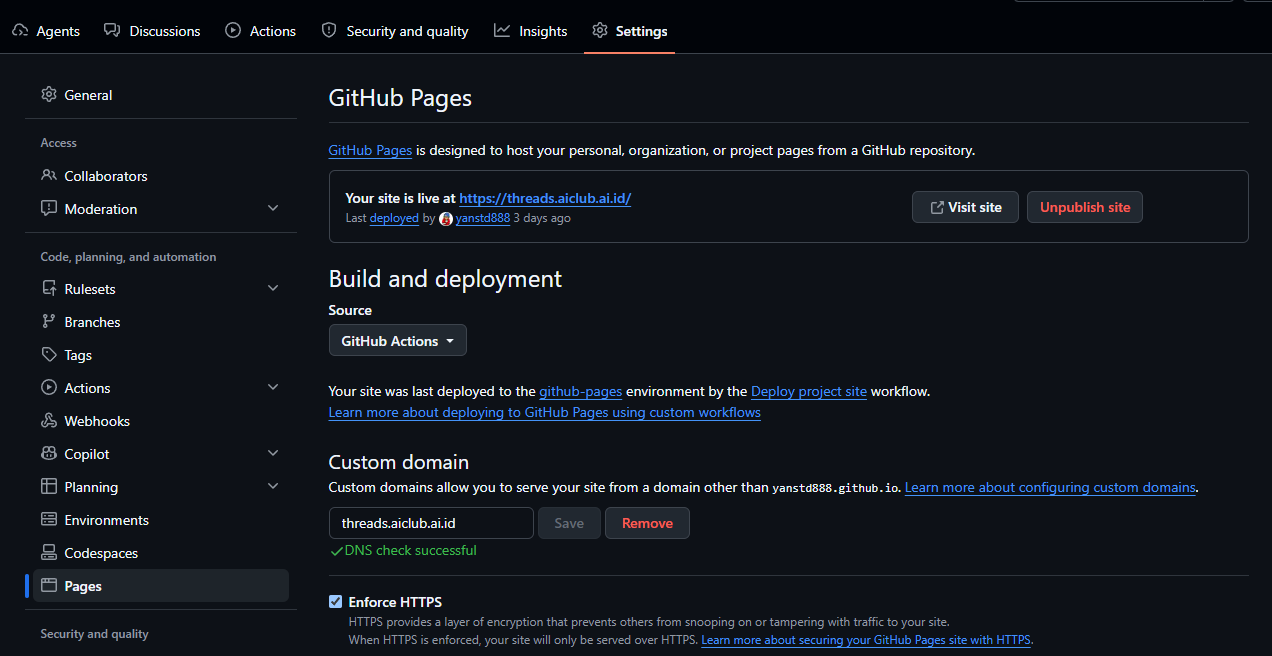
- Pastikan site sudah dipublikasikan, lalu isi Custom domain dengan
namamu.aiclub.ai.iddan Save. - Target CNAME AICLUB harus hostname default seperti
username.github.io; jangan tambahkan/nama-repositoryatauhttps://. - Tunggu DNS check menunjukkan status berhasil.
- Wajib: aktifkan Enforce HTTPS. Setup belum selesai sebelum opsi ini tercentang.
- Gunakan verifikasi domain TXT GitHub bila tersedia agar domain tidak dapat diambil pihak lain.
- Jika Enforce HTTPS belum tersedia, tunggu verifikasi domain dan sertifikat selesai sebelum membagikan URL.
VPS atau server sendiri
- Gunakan A Record dengan IPv4 publik saja; jangan masukkan URL, port, atau path.
- Pastikan firewall/security group dan router membuka TCP port
80dan443. - Atur virtual host/server_name untuk
namamu.aiclub.ai.id. - Untuk static site Caddy, gunakan
root * /var/wwwdanfile_server; untuk aplikasi, gunakanreverse_proxy 127.0.0.1:4000. - Pasang TLS dan uji dari luar server. Caddy dapat menerbitkan HTTPS otomatis setelah DNS dan port siap; Nginx biasanya memakai ACME/Certbot.
Sources and review date
Last reviewed: 2026-10-25. Primary setup documentation: Cloudflare Pages, Vercel, Netlify, and GitHub Pages. Terakhir ditinjau: 2026-10-25; sumber utama adalah dokumentasi resmi penyedia di atas.